
Table of Contents
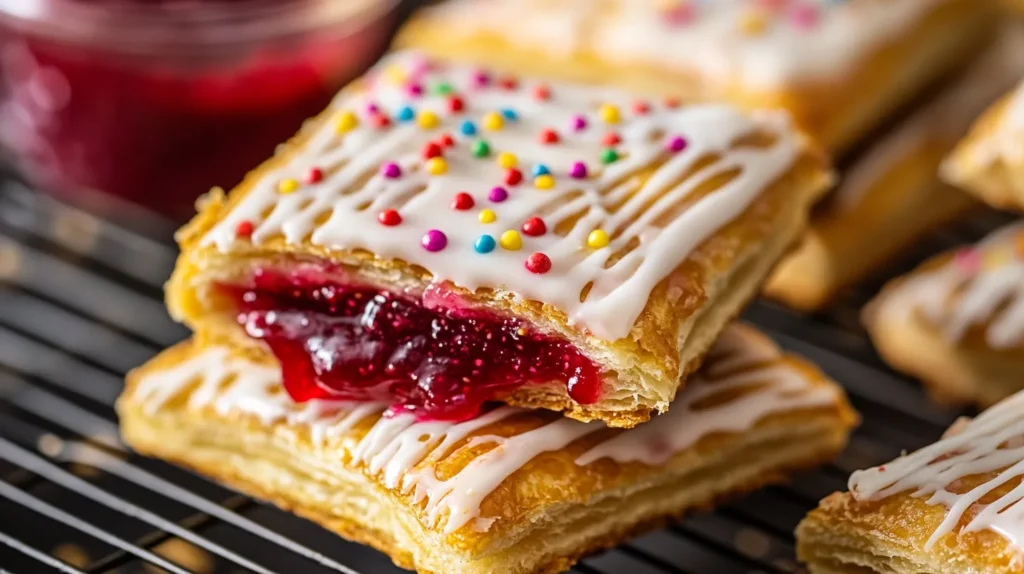
Homemade pop tarts bring back childhood memories of biting into a warm, flaky pastry with sweet filling oozing out. While store-bought pop tarts are convenient, they often contain artificial flavors, preservatives, and excessive sugar. Making them at home allows you to control the ingredients, customize flavors, and enjoy a fresher taste without unnecessary additives.
This guide will walk you through the step-by-step process of making homemade pop tarts, from preparing the perfect dough to filling and baking them to perfection. Whether you love classic strawberry pop tarts or want to experiment with Nutella or peanut butter fillings, this recipe covers it all. Additionally, you’ll learn expert tips for achieving a bakery-quality texture and how to store them for long-lasting freshness.
Not only are homemade pop tarts healthier, but they are also budget-friendly. You can create a large batch using simple ingredients like flour, butter, and jam, making them a great breakfast or snack option. Plus, you can tailor them to dietary preferences, such as gluten-free, dairy-free, or vegan.
By the end of this article, you’ll have everything you need to make the best homemade pop tarts. From understanding the key ingredients to learning the best storage techniques, this guide ensures your pop tarts turn out crisp, flavorful, and better than any boxed version.
Why Make Homemade Pop Tarts Instead of Buying?
Store-bought pop tarts might be convenient, but they come with a long list of preservatives, artificial flavors, and high fructose corn syrup. While they may taste good, they lack the freshness and quality of homemade versions. Making your own pop tarts allows you to control what goes into them, ensuring a healthier and more flavorful pastry.
1. Healthier Ingredients
Commercial pop tarts often contain artificial colors, excessive sugar, and hydrogenated oils. By making them at home, you can use real butter, organic flour, and natural fruit preserves, avoiding unnecessary chemicals. Additionally, you can reduce sugar or use healthier alternatives like honey or maple syrup.
2. Customizable Fillings & Flavors
One of the best parts about homemade pop tarts is the ability to create unique flavors. While store-bought options are limited to common flavors like strawberry, blueberry, and brown sugar cinnamon, homemade pop tarts open the door to endless possibilities. You can experiment with:
- Classic Fillings: Strawberry, raspberry, apple cinnamon
- Decadent Fillings: Nutella, peanut butter, caramel
- Seasonal Options: Pumpkin spice, lemon curd, cranberry-orange
Not only do you get better variety, but you can also adjust sweetness levels and avoid artificial flavors.
3. Fresher & Better Texture
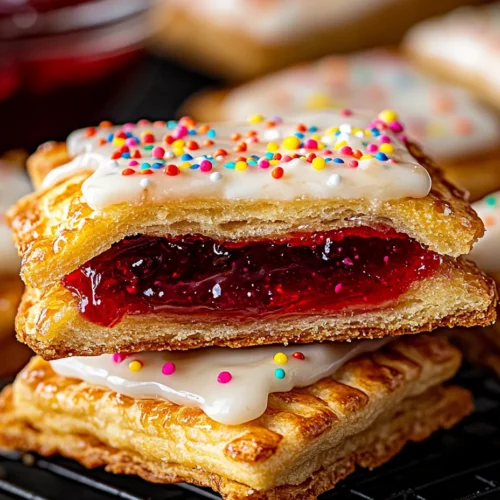
Homemade pop tarts offer a flaky, buttery crust that you can’t achieve with processed versions. Store-bought varieties are often dry and dense due to preservatives used to prolong shelf life. When you make them at home, you get a light, crisp, and fresh pastry with a perfect balance of crunch and softness.
4. Budget-Friendly & Family-Friendly
A single box of store-bought pop tarts can cost several dollars, and the quality isn’t always great. With a few pantry staples, you can make a large batch at home for a fraction of the cost. Plus, making them can be a fun family activity, allowing kids to help roll out dough and choose their favorite fillings.
5. Adaptable to Dietary Preferences
Homemade pop tarts can be tailored to specific dietary needs. Whether you’re looking for gluten-free, dairy-free, or sugar-free options, you can easily swap ingredients to match your dietary goals. Store-bought pop tarts don’t offer this level of flexibility, making homemade versions the better choice for those with food sensitivities or preferences.
Making your own pop tarts means enjoying a fresher, healthier, and more delicious version of this nostalgic treat. Now, let’s move on to the ingredients and equipment you’ll need to get started.
Best Homemade Pop Tart Flavors & Variations
One of the best things about making pop tarts at home is the ability to customize the flavors. Unlike store-bought versions, which offer limited choices, homemade pop tarts let you experiment with classic, decadent, and even healthier options. Below are some of the most popular and creative flavors to try.
1. Classic Pop Tart Fillings
These traditional flavors are inspired by the original store-bought versions but taste fresher and more delicious:
- Strawberry: A nostalgic favorite made with real strawberry jam or preserves.
- Blueberry: Sweet and tangy, using fresh or frozen blueberries cooked down into a jam.
- Brown Sugar Cinnamon: A comforting mix of brown sugar, cinnamon, and melted butter for a warm, spiced flavor.
2. Decadent & Dessert-Inspired Pop Tarts
For those who love richer, dessert-style pop tarts, try these indulgent flavors:
- Nutella & Banana: Creamy chocolate-hazelnut spread with thin banana slices for extra sweetness.
- S’mores: A delicious mix of chocolate and marshmallow filling with a graham cracker crust variation.
- Peanut Butter & Jelly: A nostalgic PB&J flavor with smooth peanut butter and fruit preserves.
- Salted Caramel Apple: Caramelized apples with a hint of cinnamon and a drizzle of salted caramel.
3. Unique & Seasonal Flavors
These flavors add a special twist, making your homemade pop tarts stand out:
- Pumpkin Spice: A fall favorite with pumpkin puree, cinnamon, and nutmeg.
- Lemon Curd: A bright and tangy option for those who prefer citrus flavors.
- Matcha White Chocolate: A sophisticated blend of earthy matcha and creamy white chocolate.
- Chai Spiced Pear: Warm spices combined with soft, baked pears for a cozy flavor.
4. Healthy & Dietary-Friendly Pop Tarts
For those looking for healthier or allergy-friendly alternatives, these options work well:
- Gluten-Free Pop Tarts: Made with almond flour or a gluten-free pastry mix.
- Vegan Pop Tarts: Use coconut oil or vegan butter in the dough and plant-based milk for icing.
- Sugar-Free Pop Tarts: Sweetened with stevia, monk fruit, or natural fruit puree.
- High-Protein Pop Tarts: Use a protein-rich dough made with almond flour and a protein-packed filling like Greek yogurt or nut butter.
5. Creative Frosting & Toppings
A pop tart isn’t complete without icing! Here are some fun ways to top them:
- Classic Vanilla Glaze: Powdered sugar, milk, and vanilla extract.
- Chocolate Drizzle: Melted dark chocolate drizzled on top.
- Sprinkles: Add a fun, colorful touch with rainbow or chocolate sprinkles.
- Crushed Nuts or Coconut Flakes: Adds crunch and texture.
With these endless possibilities, you can create pop tarts that suit any craving, season, or dietary need. Next, let’s go over pro tips to make bakery-quality pop tarts at home.
What You Need to Make Homemade Pop Tarts
Before diving into the step-by-step instructions, it’s essential to gather the right ingredients and tools. Making homemade pop tarts is easier than you might think, especially when you have the right supplies on hand. Below is a breakdown of everything you need for perfectly flaky and delicious pop tarts
Homemade Pop Tarts Recipe
Equipment
- 1 Mixing Bowl (for making the dough)
- 1 Rolling Pin (for rolling out the dough)
- 1 Baking Sheet (for baking the pop tarts)
- 1 Fork (for sealing the edges)
- 1 Pastry Brush (for egg wash)
Ingredients
For the Dough:
- 2 ½ cups all-purpose flour
- 1 tbsp granulated sugar
- 1 tsp salt
- 1 cup unsalted butter cold and cubed
- 6 tbsp ice water
For the Filling:
- ½ cup strawberry jam or filling of choice
- 1 tbsp cornstarch optional, to thicken jam
For the Egg Wash:
- 1 egg
- 1 tbsp milk
For the Glaze:
- 1 cup powdered sugar
- 2 tbsp milk
- ½ tsp vanilla extract
- Sprinkles optional
Instructions
- Prepare the Dough: In a mixing bowl, combine flour, sugar, and salt. Add cold butter and mix until the mixture resembles coarse crumbs. Gradually add ice water and mix until a dough forms. Shape into a disk, wrap in plastic wrap, and refrigerate for 30 minutes.
- Prepare the Filling: If using jam, mix it with cornstarch in a small saucepan over low heat until slightly thickened. Let it cool completely.
- Roll Out the Dough: On a lightly floured surface, roll out the dough to about ⅛ inch thick. Cut into rectangles, about 3×4 inches in size.
- Assemble the Pop Tarts: Place one rectangle on a baking sheet, spoon a small amount of filling in the center, leaving space at the edges. Top with another rectangle and press the edges with a fork to seal.
- Apply Egg Wash: Whisk together egg and milk, then brush the tops of the pop tarts with the egg wash.
- Bake: Preheat the oven to 375°F (190°C). Bake for 20-25 minutes or until golden brown. Let cool completely.
- Prepare the Glaze: Mix powdered sugar, milk, and vanilla extract in a bowl until smooth. Drizzle over cooled pop tarts and add sprinkles if desired.
- Serve and Store: Enjoy immediately or store in an airtight container at room temperature for up to 3 days.
Notes
Pro Tips to Make Bakery-Quality Pop Tarts at Home
Achieving the perfect homemade pop tarts requires more than just following a recipe. Small details in the preparation and baking process can make a big difference in texture and taste. Below are expert tips to ensure your pop tarts turn out flaky, golden, and delicious—just like a bakery’s version.
1. Use Cold Butter for a Flaky Crust
The key to a light and flaky pastry is using cold butter. Just like when making pie dough, cold butter creates layers as it melts in the oven, resulting in a crisp, buttery texture. To keep it extra cold:
- Cut butter into small cubes and chill it before mixing.
- Use ice-cold water or milk to bring the dough together.
- Chill the dough for at least 30 minutes before rolling it out.
2. Roll Dough Evenly for Consistent Baking
Uneven dough thickness can lead to some pop tarts burning while others remain undercooked. To prevent this:
- Roll out the dough ¼-inch thick—thin enough to be crisp but sturdy enough to hold the filling.
- Use a ruler or dough guide to cut even rectangles.
3. Don’t Overfill—Avoid Messy Leaks
It’s tempting to load pop tarts with extra filling, but too much can cause spillage while baking. To prevent this:
- Add 1 to 1.5 tablespoons of filling in the center.
- Leave about ½ inch of space around the edges to seal properly.
4. Seal the Edges Well to Prevent Opening
Properly sealing the edges ensures the filling stays inside. Here’s how to do it:
- Lightly brush the edges with water or egg wash before pressing the top layer down.
- Use a fork to crimp the edges and seal them securely.
- If needed, double-seal by pressing the edges with a second layer of crimping.
5. Chill the Assembled Pop Tarts Before Baking
Chilling prevents the dough from spreading too much in the oven. After assembling:
- Place pop tarts on a baking sheet and refrigerate for 15-20 minutes before baking.
6. Bake at the Right Temperature for Even Cooking
Baking pop tarts at the right temperature ensures a crisp, golden crust. The best oven setting is:
- 375°F (190°C) for 20-25 minutes, or until the edges turn golden brown.
7. Let Them Cool Before Adding Frosting
If you add icing while the pop tarts are still hot, it will melt into a sticky mess. Instead:
- Let pop tarts cool on a wire rack for at least 10 minutes before adding the glaze.
8. Customize Your Frosting for Extra Flavor
A simple powdered sugar glaze is great, but you can enhance it by adding:
- Vanilla extract for a classic taste.
- Lemon juice or zest for a citrusy zing.
- Cocoa powder for a chocolate glaze.
- Espresso powder for a mocha twist.
9. Store Them Properly for Freshness
Homemade pop tarts don’t have preservatives, so storing them correctly helps maintain freshness:
- Room temperature: Store in an airtight container for up to 2 days.
- Refrigerator: Keep in a sealed container for up to 1 week.
- Freezer: Wrap individually in plastic wrap and store for up to 2 months.
10. Reheat for the Best Texture
To enjoy pop tarts as if they were freshly baked:
- Toaster Oven: Best method for reheating while keeping the crust crispy.
- Oven: Reheat at 350°F for 5-7 minutes.
- Microwave: Quick option, but it will make the pastry softer instead of crispy.

Common Mistakes to Avoid When Making Pop Tarts
| Mistake | Why It’s a Problem | How to Fix It |
|---|---|---|
| Overfilling the Pop Tarts | Causes filling to leak out during baking, making edges messy. | Use only 1 to 1.5 tablespoons of filling and leave a ½-inch border around edges. |
| Not Sealing the Edges Properly | Filling may spill out, and the layers can separate. | Crimp edges with a fork and use water or egg wash to seal better. |
| Using Dough That’s Too Warm | Warm dough is sticky and difficult to work with. | Chill dough for at least 30 minutes before rolling it out. Refrigerate again if it becomes soft. |
| Rolling the Dough Too Thin or Too Thick | Thin dough breaks easily, thick dough won’t bake evenly. | Roll the dough to ¼-inch thickness for the best texture. |
| Baking at the Wrong Temperature | Too hot = burns outside, raw inside. Too low = soft and pale pastry. | Bake at 375°F (190°C) for 20-25 minutes for even cooking. |
| Skipping the Chilling Step Before Baking | Pop tarts may lose shape and spread too much. | Chill assembled pop tarts for 15-20 minutes before baking. |
| Not Letting Them Cool Before Adding Icing | Glaze melts into a runny mess if applied too soon. | Let pop tarts cool for at least 10 minutes before icing. |
| Using the Wrong Type of Filling | Watery fillings make pastry soggy and can leak. | Use thick fruit preserves, jams, or cooked fruit fillings instead of fresh fruit. |
| Storing Pop Tarts Incorrectly | Exposed pop tarts dry out quickly and lose texture. | Store in an airtight container at room temp for 2 days, fridge for 1 week, or freezer for 2 months. |
| Reheating Them Improperly | Microwaving makes them soft instead of crispy. | Reheat in a toaster, toaster oven, or 350°F oven for 5-7 minutes for best results. |
By following these fixes, your homemade pop tarts will be flaky, golden, and delicious every time.
Frequently Asked Questions About Homemade Pop Tarts
To enhance the comprehensiveness of our guide and improve search engine ranking, here are four additional frequently asked questions (FAQs) about homemade pop tarts:
Can I use store-bought pie crust to make homemade pop tarts?
Yes, using store-bought pie crust is a convenient alternative to homemade dough. It simplifies the process and reduces preparation time. Ensure you roll out the crust to the desired thickness and follow the same assembly and baking instructions. This method is particularly useful for those seeking a quicker preparation.
How can I make gluten-free homemade pop tarts?
To make gluten-free pop tarts, substitute the all-purpose flour in the dough with a gluten-free flour blend that is suitable for baking. Ensure that all other ingredients, including fillings and toppings, are also gluten-free. The process remains the same, but be mindful that gluten-free dough may have a different texture and may require careful handling.
Can I prepare homemade pop tarts in advance?
Yes, you can prepare homemade pop tarts ahead of time. After assembling the pop tarts, place them on a baking sheet lined with parchment paper and freeze until solid. Once frozen, transfer them to an airtight container or freezer bag. When ready to bake, preheat the oven and bake from frozen, adding a few extra minutes to the baking time. This method allows you to enjoy freshly baked pop tarts whenever you desire.
What are some savory filling options for homemade pop tarts?
While pop tarts are traditionally sweet, savory versions can be a delightful alternative. Consider fillings such as cheese and ham, spinach and feta, or pesto and roasted vegetables. To complement the savory fillings, omit or reduce the sugar in the dough recipe. Brush the tops with an egg wash and sprinkle with sesame or poppy seeds before baking for added flavor and texture.
Conclusion: Why Homemade Pop Tarts Are Worth Making
Homemade pop tarts are a delicious and rewarding treat that allows for customization, healthier ingredients, and fresher taste compared to store-bought versions. Whether you prefer classic strawberry, indulgent Nutella, or a unique seasonal flavor, making pop tarts from scratch ensures flaky, golden, and perfectly filled pastries every time.
This recipe is perfect for breakfast, a quick snack, or even a sweet addition to brunch. Plus, with endless variations, you can tailor them to your dietary needs, whether gluten-free, vegan, or low-sugar.
Now that you have the ultimate guide to making homemade pop tarts, it’s time to get creative in the kitchen. Try out different fillings, experiment with flavors, and enjoy a homemade version of this nostalgic treat. Whether you’re making them for kids, family, or just yourself, these pop tarts will surely become a go-to favorite.
1 thought on “Homemade Pop Tarts Recipe”